
 Jane and John's RV pages
We finally kiss the one-thirds goodbye!
Hello Garnet SeeLevel tank monitor system
>Page 8 - Wiring and project wrap-up. Addendum added to chart freshwater tank actual gallons to SeeLevel percentage readings
Getting very close to the end! Thanks for hanging in there with us through eight pages (you have read all eight pages - right?) Now things will go quickly - all that's left is getting the SeeLevel's wiring harness hooked up to the old monitor wiring (a grand total of four wires!!) and installing the new display.
Let's get going!

Here's what the mess of wires looks like after you removed the old circuit board. That string of white wires with the push-on connectors is a ground - you can use that for your SeeLevel ground connection if you wish, or use the white wire off the plug in the picture below.

Your simple wiring job! Pull (they will pull right out of the plug - no reason to cut them) the selected wires from the plug and hook 'er up!

Here's what my install looked like at this point. All I lacked was installing the new green LED to the solar panel circuit I previously cut out of the old circuit board
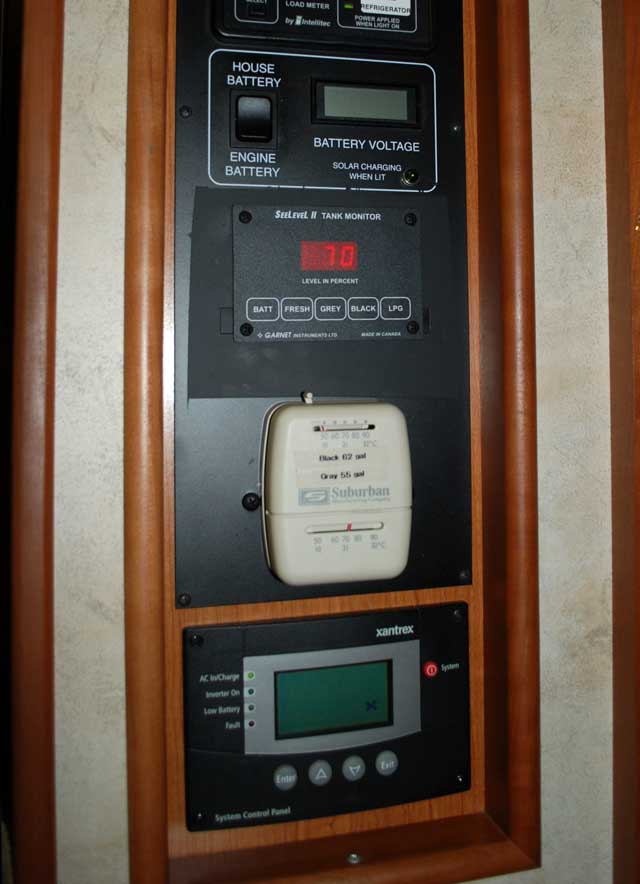
You can really see the difference in the new spray paint (Rustoleum flat black) and the original finish which is more of a satin finish. Like I said in page seven, I should have sprayed everything below the voltmeter and the full width of the panel. It looks a little funky in this picture taken with a flash, but with normal light it looks just fine!
Okay - good job! All done! Fini! Concluir! Vervollstaendigen! Completare! Fullkomlig! полный!
Addendum - July 27, 2013
I found a great closeout deal on a digital water meter at some Camping World we were in a few months ago and I snapped it right up with the idea of "calibrating" our SeeLevel fresh water tank gauge. Since the tank is irregularly shaped, when the Seelevel reports 50% full, it's not really half full.
Starting with a completely empty tank, I hooked up the digital flow meter to the hose and started filling the tank while making note of the flow meter reading and the percentage reading of the SeeLevel. Later I made a chart for reference.
1/4 tank (25 gallons) |
- | 31% SeeLevel reading |
|---|---|---|
1/2 tank (50 gallons) |
- | 57% |
3/4 tank (75 gallons) |
- | 86% |
83 gallons |
- | 100% |
4/4 (100 gallons) |
- | 100% |
Note that when we reach 83 gallons the SeeLevel indicates 100% full - this is due to the sensor strip not going all of the way to the top of the tank, I didn't see any reason to add a second strip just to cover a few inches of tank. I could also do the same thing for the black and gray tanks but that's not very high on the to-do list.
Page 1 - project introduction
Page 2 - pictures of the 'special tools' and jigs I used, picture of the Garnet system, disassembly of the plumbing bay part 1
Page 3 - we finish disassembly of the plumbing bay and look at wiring
Page 4 - we test and finish up sensor strip installation
Page 5 - building a bezel for the outside display, finishing up the outside
Page 6 - access to the fresh water tank, installing the sensor strips on the tank wall, sensor wiring
Page 7 - we start installing the inside display, removal of the old display board & switches, cutting off the solar panel part of the old circuit board (optional), cutting an opening in the OnePlace steel panel for the new display
>Page 8 - Wiring and project wrap-up