
 Jane and John's RV pages
Jane and John climb aboard the LED lighting bandwagon
Introduction
We went "green" several months ago with the addition of solar panels and continuing on in that same vein, we're now changing out much of the Horizon's incandescent and fluorescent lighting to Light Emitting Diode technology. LED technology has significantly improved in the last few years with LEDs getting brighter and becoming more affordable. At this point, LED lighting for the typical house is still a little impractical primarily due to the cost of the very high density and high output LED lights, but for an RV it is very affordable and terribly practical, more so if you camp where there is no commercial power available.
Continuing with our RV application, the typical 12V incandescent auto-type bulb that is everywhere in an RV, uses maybe 1 amp, maybe 1.6 amps (while generating quite a bit of heat in the process) and a high lumen output LED replacement bulb would use about 0.12 amps or 8-10x less energy. That's a considerable savings for your battery when not on shore power (multiply that savings by five or six lights that might be burning) not to mention that you're saving the planet ;-).
The problem
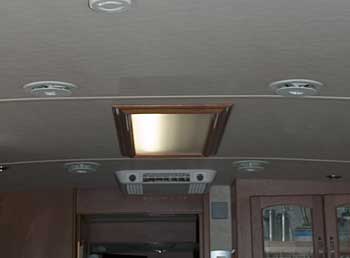 What precipitated this effort (and article) were our salon fluorescent lights. For many months one of the 36 watt tubes would not burn (picture to the left.) Finally I bought a replacement tube, installed it, and guess what - it still didn't work. Grrrr. That meant it was a bad ballast (an electronic circuit board that drives the tubes); a replacement ballast is about $25-30 and you have to remove the fixture, drill out the pop rivets that fasten the board to the housing, pop-rivet the new ballast in, wire it up and re-install.
Way too much trouble and expense to return back to the traditional electronic ballast and fluorescent tube technology (that isn't terribly reliable and can cause interference with other electronic devices.)
The plan
The plan at this increment is to change the salon overhead light fixtures to strip LED lights and forever rid ourselves of fluorescent lighting. Ultimately we'll change the recessed ceiling halogen 'puck' lights and our last two 18" fluorescent fixtures in the galley to LED. There are several other light fixtures that are a ripe candidate for conversion as well, but we'll focus on the salon for now.
Originally I was trying to find a more or less 'drop-in' replacement LED tube that was 36" long and 36 watts equivalent. 12" and 18" versions in 12V are very common, but to my surprise, there are NO 36" replacements in 12V anywhere. I could find a 36" replacement LED 'bulb' or tube for 110 VAC, but I thought converting it to 12V would be a hassle with no guaranteed results.
Enter LED 'strip' lights :-)
A very brief flexible strip light primer
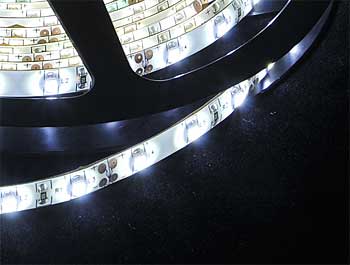 Strip LED lighting is a narrow strip (of various lengths) of material to which a bunch of LED lights are soldered down that can produce various colors of light (or just white) when typically 12V DC is applied (or possibly 24V DC). Sounds simple, but what I've found is there are a huge number of buying considerations to make. There are strip lights that are waterproof, some rated for indoor-only use, some are brighter than others with more LEDs per inch (per meter or per roll), some will have a warm-white color, some are 'cool' white, some are regulated, some aren't, some can have varying light levels or colors on one strip, and the list of attributes goes on and on.
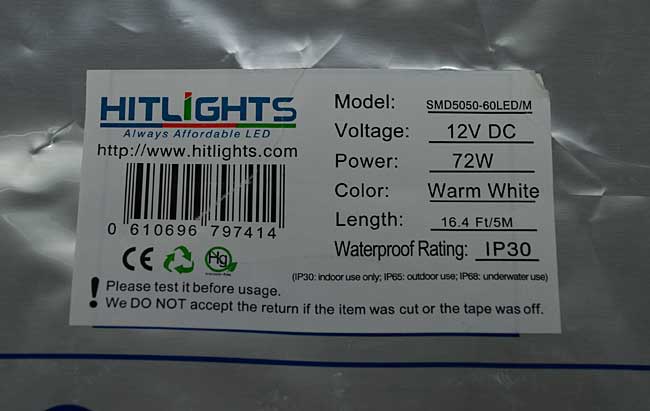
I'm new to strip light technology, so I'm sort of learning as I go along. Being quite the Amazon fan, that's the first place I went strip light shopping and found a likely candidate that got some good reviews, so for $25 I ordered a 16 foot strip of high-output warm-white LEDs (with sticky tape backing) - how can you go wrong for 25 bucks?
As it turns out, the lights I received met my expectations - they are bright and it was fairly obvious where to cut the strips to length and how to wire them. My only complaint is the double-sticky tape is not uniformly applied to the back of the strips and some of the strip would not lay flat against the target surface, but this isn't a real big deal for me.
Working with the strips - tips and techniques
The next page will deal with cutting and soldering the strips and tools required. There are some push-on connectors available from certain light vendors that avoids the soldering part, but as far as I know the push-on connector would be for use with that vendor's particular light strip.
After we look at tips and techniques, we'll move on to the actual project of using them.
Page 1 - This page
Page 2 - Tips and techniques
Page 3 - Installing the strip lights